简易的模板编译器
实际上,目前我们需要实现的东西大致都已经完成了(?)
到目前为止,我们已经实现了 Reactivity System 响应式系统、Virtual DOM 虚拟 DOM 和 Component 组件系统。 虽然已实现的这些内容都很简单并且不是很实用,但是毫不夸张的说,我们对 Vue.js 的整体已经有了大致的了解。 每个部分都缺乏完整的功能,给我们的感觉就像刚刚要接近终点的位置,但始终没有达到终点一样。
所以从本章开始,我们将实现模板功能,让它更加接近 Vue.js。当然这些只是为了改进 DX(Developer Experience),并不会影响运行时的内容。 更具体地说,我们将扩展开发者使用接口以改进 DX,并“最终将其转换为我们迄今为止所做的内部实现支持的结构”。
译者注:DX 概念可以参考 What Is DX? (Developer Experience)
这次想要实现的开发者接口
现在我们完成的是这样的开发者界面。
const MyComponent: Component = {
  props: { someMessage: { type: String } },

  setup(props: any, { emit }: any) {
    return () =>
      h('div', {}, [
        h('p', {}, [`someMessage: ${props.someMessage}`]),
        h('button', { onClick: () => emit('click:change-message') }, [
          'change message',
        ]),
      ])
  },
}

const app = createApp({
  setup() {
    const state = reactive({ message: 'hello' })
    const changeMessage = () => {
      state.message += '!'
    }

    return () =>
      h('div', { id: 'my-app' }, [
        h(
          MyComponent,
          {
            'some-message': state.message,
            'onClick:change-message': changeMessage,
          },
          [],
        ),
      ])
  },
})
目前,View 视图部分是使用 h 函数构建的。为了更接近原始的 HTML 的写法,我想在 template 选项中编写 HTML 格式的模板。
话虽如此,如果我们一次性实现各种功能是很困难的,所以稍微缩减一下功能来完成。
总之,我们分成以下的任务进行。
- 能够绘制简单的标签、消息和静态属性
const app = createApp({ template: `<p class="hello">Hello World</p>` })- 能够渲染复杂一些的 HTML 内容
const app = createApp({
  template: `
    <div>
      <p>hello</p>
      <button> click me! </button>
    </div>
  `,
})- 能够使用
setup函数中定义的内容。
const app = createApp({
  setup() {
    const count = ref(0)
    const increment = () => {
      count.value++
    }

    return { count, increment }
  },

  template: `
    <div>
      <p>count: {{ count }}</p>
      <button v-on:click="increment"> click me! </button>
    </div>
  `,
})
在后面的实现过程中我还会细分成更小的步骤,但是这里我将它大致分为这三个部分。
现在,我们从 1 开始吧。
实现模板编译器的第一步
现在,我们要实现的开发者界面如下。
const app = createApp({ template: `<p class="hello">Hello World</p>` })首先,我们先理解一下“编译器”到底是什么。
当我们编写软件时,有可能会听到“编译器”这个词。“编译”的意思也可以理解为“翻译”,在软件开发领域,通常用来表示“从高层语法描述转化为低层的语法描述的转化过程”。
你还记得本书开头的这句话吗?
为图简便,我将其称为“低级开发者接口”,因为它更加接近于原生的 JS。 当然这也是最重要的一部分,需要“从最基础的低级接口的实现开始”。 因为在很多情况下,高级语法都需要被转化成低级语法。 也就是说,1 和 2 最终也会被转换成 3 的形式,这部分转化功能,被称为 编译器。
现在我们应该就能理解为什么需要这个编译器了吧,它的一大目的就是“改善开发体验”。毕竟就算没有编译器,我们也已经提供了一个可用的“低级”开发者接口,开发者也可以用这些功能来进行开发。
但是在实现编译器时,如果我们考虑进去很多与功能无关的部分,那就会导致文档描述很难理解,或者使用上非常麻烦和繁琐,出现各种问题。
因此我们也要考虑开发者的感受,只开发关于界面的部分。
对此,Vue.js 的目标就是“像写原生的 HTML 一样,并且可以灵活使用用 Vue 提供的功能 (指令等) 更方便地编写 View 视图”。 并且,最终的目标就是实现 SFC。
虽然,现在随着 jsx/tsx 的流行,Vue 也提供了类似的开发者选项。 但是,这次我依然想在 Vue 如何实现 template 解析的方向上尝试一下。
这章我用了很长的篇幅来解释了我想做的事情。
就像这样的代码:
const app = createApp({ template: `<p class="hello">Hello World</p>` })我想实现一个这样的翻译(编译)功能,也就是翻译为这样的结果。
const app = createApp({
  render() {
    return h('p', { class: 'hello' }, ['Hello World'])
  },
})
如果你想把范围再缩小一点,这就是这部分。
;`<p class="hello">Hello World</p>`
// ↓
h('p', { class: 'hello' }, ['Hello World'])
我们分几个阶段来逐步实现。
尝试实现简易编译器。
实现方式
基础思想是通过操作 template 模板选项中传递的字符串来生成特定的函数。
让我们将编译器的实现分为三个部分。
解析
解析(parse)方法,负责从传递的字符串中分析所需的信息。如果您能得到如下所示的结果就差不多了。
const { tag, props, textContent } = parse(`<p class="hello">Hello World</p>`)
console.log(tag) // "p"
console.log(prop) // { class: "hello" }
console.log(textContent) // "Hello World"
代码生成
代码生成(codegen)方法负责根据 parse 的结果生成代码 (字符串)。
const code = codegen({ tag, props, textContent })
console.log(code) // "h('p', { class: 'hello' }, ['Hello World']);"
函数对象生成
根据 codegen 生成的代码 (字符串) 生成实际可执行的函数。 在 JavaScript 中,可以通过使用 Function 构造函数从字符串生成函数。
const f = new Function('return 1')
console.log(f()) // 1

// 这样定义参数
const add = new Function('a', 'b', 'return a + b')
console.log(add(1, 1)) // 2
我们可以利用这个来生成函数。
这里有一点需要注意,生成的函数只能处理参数中定义的变量,h 函数等的读取也包含在这个对象中。
import * as runtimeDom from './runtime-dom'
const render = new Function('ChibiVue', code)(runtimeDom)
这样的话,因为我们使用了 ChibiVue 这个名字来接收了 runtimeDom 导出的所有内容,所以在 codegen 的阶段可以直接使用如下的方式获取 h 函数。
const code = codegen({ tag, props, textContent })
console.log(code) // "return () => { const { h } = ChibiVue; return h('p', { class: 'hello' }, ['Hello World']); }"
也就是说,刚才的
;`<p class="hello">Hello World</p>`
// ↓
h('p', { class: 'hello' }, ['Hello World'])
更准确的说,我们需要的是实现这样的内容
;`<p class="hello">Hello World</p>`

// ↓

ChibiVue => {
  return () => {
    const { h } = ChibiVue
    return h('p', { class: 'hello' }, ['Hello World'])
  }
}
转换为接收 runtimeDom 来生成 render 渲染函数对应的字符串。
codegen 函数的职责就是
const code = `
  return () => {
      const { h } = ChibiVue;
      return h("p", { class: "hello" }, ["Hello World"]);
  };
`
生成函数字符串。
实现
既然理清了思路,我们就开始实现吧。
首先在 ~/packages 的目录中创建一个 compiler-core 的目录,并且在目录下创建 index.ts、 parse.ts、 codegen.ts 三个文件。
pwd # ~/
mkdir packages/compiler-core
touch packages/compiler-core/index.ts
touch packages/compiler-core/parse.ts
touch packages/compiler-core/codegen.ts
index.ts 如之前的说明一样,仅用于 export 导出。
那么我们先从 parse 函数开始吧~ packages/compiler-core/parse.ts:
export const baseParse = (
  content: string,
): { tag: string; props: Record<string, string>; textContent: string } => {
  const matched = content.match(/<(\w+)\s+([^>]*)>([^<]*)<\/\1>/)
  if (!matched) return { tag: '', props: {}, textContent: '' }

  const [_, tag, attrs, textContent] = matched

  const props: Record<string, string> = {}
  attrs.replace(/(\w+)=["']([^"']*)["']/g, (_, key: string, value: string) => {
    props[key] = value
    return ''
  })

  return { tag, props, textContent }
}
虽然是使用正则表达式的非常简单的解析器,但作为首次实现已经足够了。
接下来是代码生成函数。我们在 codegen.ts 中实现。packages/compiler-core/codegen.ts:
export const generate = ({
  tag,
  props,
  textContent,
}: {
  tag: string
  props: Record<string, string>
  textContent: string
}): string => {
  return `return () => {
  const { h } = ChibiVue;
  return h("${tag}", { ${Object.entries(props)
    .map(([k, v]) => `${k}: "${v}"`)
    .join(', ')} }, ["${textContent}"]);
}`
}
那么,将它们组合起来就可以实现从 template 字符串生成渲染函数字符串的函数了。 我们创建一个新的文件 packages/compiler-core/compile.ts。
packages/compiler-core/compile.ts 的内容:
import { generate } from './codegen'
import { baseParse } from './parse'

export function baseCompile(template: string) {
  const parseResult = baseParse(template)
  const code = generate(parseResult)
  return code
}我想这部分不是特别难。其实,compiler-core 部分的职责就到此为止了。
运行时编译器和构建过程中的编译器
实际上 Vue 有两种类型的编译器。
有些在运行时(在浏览器中)运行,有些在构建过程(例如 Node.js)上运行。
运行时编译器负责编译 template 模板选项或以 HTML 形式提供的模板,而构建过程编译器负责编译 SFC(或 JSX)。
我们当前正在实现的模板选项编译属于前一类。
const app = createApp({ template: `<p class="hello">Hello World</p>` })
app.mount('#app')<div id="app"></div>或者是一个以 HTML 形式提供模板选项的“开发者界面”,您可以在其中使用 HTML 编写 Vue 模板(方便通过 CDN 等方式快速合并渲染内容到原 HTML 中)。
const app = createApp()
app.mount('#app')<div id="app">
<p class="hello">Hello World</p>
<button @click="() => alert('hello')">click me!</button>
</div>这两种方式都需要将 template 模板进行编译,但是编译过程是在浏览器上进行的。
另一方面,则是发生在工程构建时的 SFC 文件编译,运行时部分只存在编译后的代码。(开发环境需要准备 Vite、Webpack 等打包工具)
<!-- App.vue -->
<script>
export default {}
</script>

<template>
  <p class="hello">Hello World</p>
  <button @click="() => alert("hello")">click me!</button>
</template>import App from 'App.vue'
const app = createApp(App)
app.mount('#app')<div id="app"></div>但是,值得注意的是无论是哪种编译,核心处理逻辑都是通用的。
也就是我们在 compiler-core 中实现的这部分公共代码。
运行时编译器和 SFC 编译器分别在目录 compiler-dom 和 compiler-sfc 中实现。
请看下图。
https://github.com/vuejs/core/blob/main/.github/contributing.md#package-dependencies
继续实现
刚刚讨论多了一点,现在我们接着实现后面的内容。
考虑到我们刚才说过我们现在实现的是运行时的编译器,所以我们创建一个 compiler-dom 目录更好一点。
pwd # ~/
mkdir packages/compiler-dom
touch packages/compiler-dom/index.ts
packages/compiler-dom/index.ts 的实现。
import { baseCompile } from '../compiler-core'

export function compile(template: string) {
  return baseCompile(template)
}
现在你可能会想“嗯,这样的话只是 codegen 代码生成而已。函数的生成该怎么办?”
其实最后的函数不是在这里生成的,而是在 package/index.ts 中完成的(源代码中的 packages/vue/src/index.ts)。
我们后面会实现 package/index.ts,但是现在需要做一些准备工作。
首先在 package/runtime-core/component.ts 创建一个变量用来保存编译器对象,并实现一个注册函数用来注册编译器对象。
package/runtime-core/component.ts
type CompileFunction = (template: string) => InternalRenderFunction
let compile: CompileFunction | undefined

export function registerRuntimeCompiler(_compile: any) {
  compile = _compile
}
现在,让我们在 package/index.ts 创建一个编译器并注册它。
import { compile } from './compiler-dom'
import { InternalRenderFunction, registerRuntimeCompiler } from './runtime-core'
import * as runtimeDom from './runtime-dom'

function compileToFunction(template: string): InternalRenderFunction {
  const code = compile(template)
  return new Function('ChibiVue', code)(runtimeDom)
}

registerRuntimeCompiler(compileToFunction)

export * from './runtime-core'
export * from './runtime-dom'
export * from './reactivity'
※ runtime-dom 必须要包含 h 函数,所以不要忘记在 runtime-dom 导出它。
export { h } from '../runtime-core'现在编译器已经注册好了,我想实际用它来编译一下。
但是组件的选项中如果没有 template 的话是无法进入模板编译的,所以我们需要先把 template 定义好。
export type ComponentOptions = {
  props?: Record<string, any>
  setup?: (
    props: Record<string, any>,
    ctx: { emit: (event: string, ...args: any[]) => void },
  ) => Function
  render?: Function
  template?: string // 追加
}
最重要的就是编译了,所以我们还需要稍微重构一下 renderer 渲染器。
const mountComponent = (initialVNode: VNode, container: RendererElement) => {
  const instance: ComponentInternalInstance = (initialVNode.component =
    createComponentInstance(initialVNode))

  // ----------------------- 从这里开始
  const { props } = instance.vnode
  initProps(instance, props)
  const component = initialVNode.type as Component
  if (component.setup) {
    instance.render = component.setup(instance.props, {
      emit: instance.emit,
    }) as InternalRenderFunction
  }
  // ----------------------- 到此结束

  setupRenderEffect(instance, initialVNode, container)
}
将上面的 mountComponent 方法提取到 package/runtime-core/component.ts 中。
package/runtime-core/component.ts:
export const setupComponent = (instance: ComponentInternalInstance) => {
  const { props } = instance.vnode
  initProps(instance, props)

  const component = instance.type as Component
  if (component.setup) {
    instance.render = component.setup(instance.props, {
      emit: instance.emit,
    }) as InternalRenderFunction
  }
}
package/runtime-core/renderer.ts
const mountComponent = (initialVNode: VNode, container: RendererElement) => {
  // prettier-ignore
  const instance: ComponentInternalInstance = (initialVNode.component = createComponentInstance(initialVNode));
  setupComponent(instance)
  setupRenderEffect(instance, initialVNode, container)
}
然后,我们在 setupComponent 函数中来运行编译器进行模板编译。
export const setupComponent = (instance: ComponentInternalInstance) => {
  const { props } = instance.vnode
  initProps(instance, props)

  const component = instance.type as Component
  if (component.setup) {
    instance.render = component.setup(instance.props, {
      emit: instance.emit,
    }) as InternalRenderFunction
  }

  // ------------------------ 这里
  if (compile && !component.render) {
    const template = component.template ?? ''
    if (template) {
      instance.render = compile(template)
    }
  }
}
现在我们应该能够编译模板选项中传递的简单 HTML 字符串了。让我们在 Playground 上尝试一下!
const app = createApp({ template: `<p class="hello">Hello World</p>` })
app.mount('#app')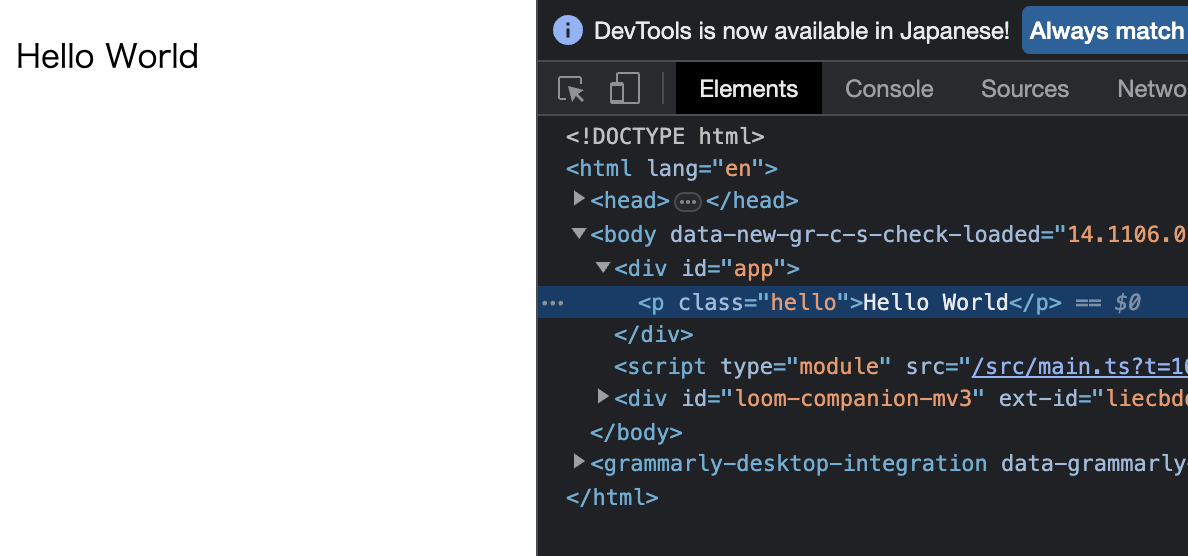
看起来运行良好。
如果结构一样的话,应该可以编译,所以我们来尝试一下,看看能否生效。
const app = createApp({
  template: `<b class="hello" style="color: red;">Hello World!!</b>`,
})
app.mount('#app')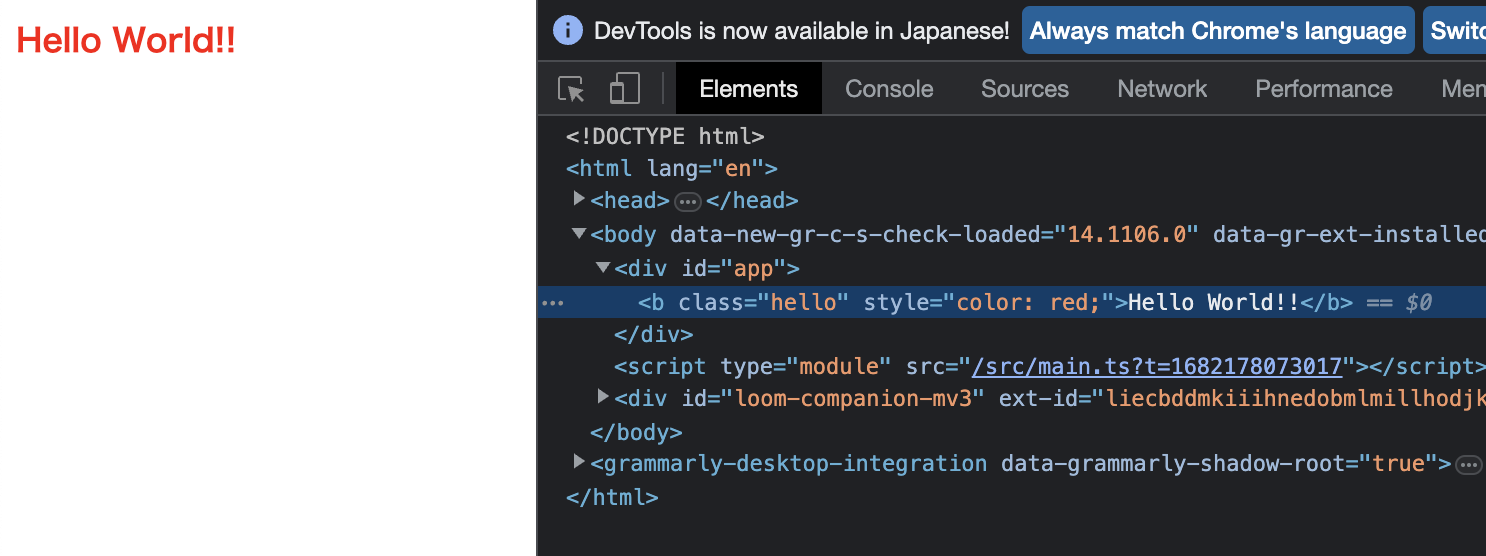
看起来已经实现了!
当前源代码位于:
chibivue (GitHub)