如何面向组件化开发
在已实现的内容上思考一下
到目前为止,我们已经实现了简化的 createApp API、Reactivity System 响应式系统和 Virtual DOM。
现在我们已经可以通过 Reactivity System 动态更新页面的 UI 显示,也可以通过 Virtual DOM 进行高效的元素渲染。作为开发者接口,开发者可以把所有的内容都写在 createApp API 上。
实际上,我还希望能够更多的拆分组件代码来完成通用组件,也就是代码复用。
首先,让我们回顾一下现有实现中比较混乱的部分。先看一下 renderer.ts 中的渲染函数。
const render: RootRenderFunction = (rootComponent, container) => {
  const componentRender = rootComponent.setup!()

  let n1: VNode | null = null
  let n2: VNode = null!

  const updateComponent = () => {
    const n2 = componentRender()
    patch(n1, n2, container)
    n1 = n2
  }

  const effect = new ReactiveEffect(updateComponent)
  effect.run()
}
之前,我们在 render 函数中直接定义了和根组件有关的类型。
实际上,每个组件都会存在 n1、n2、updateComponent 以及 effect 这些内容。 我们希望用户在定义一个组件(某种意义上就是一个构造函数)的时候并且实例化该组件的时候,它也应该具有 n1、n2、updateComponent 以及 effect。
因此,我们应该考虑将 render 的参数限制为组件实例。
现在我们在 ~/packages/runtime-core/component.ts 中定义一个名为 ComponentInternalInstance 的类型。
这就是组件实例的类型。
export interface ComponentInternalInstance {
  type: Component // 用户定义的组件 (原来的的 rootComponent (但实际上不仅仅是根组件))
  vnode: VNode // 后面会讲
  subTree: VNode // 原 n1
  next: VNode | null // 原 n2
  effect: ReactiveEffect // 原 effect
  render: InternalRenderFunction // 原 componentRender
  update: () => void // 原来的 updateComponent 函数
  isMounted: boolean
}

export type InternalRenderFunction = {
  (): VNodeChild
}
这个实例类型中定义的 vnode、subTree 和 next 稍微复杂,不过,我们现在就会着手实现它们。以便我们可以将组件 ConcreteComponent(指代组件的构造函数)作为 VNode 的 type 类型属性,然后在 instance.vnode 上保留组件本身的 VNode 对象。 而 subTree 和 next 依旧作为组件的渲染结果对应的 VNode(也就是之前的 n1 和 n2)。
从代码使用上来说,我们可以像这样编写代码:
const MyComponent = {
  setup() {
    return h('p', {}, ['hello'])
  },
}

const App = {
  setup() {
    return h(MyComponent, {}, [])
  },
}
假设此时 MyComponent 对应的组件实例就是 instance,那么 instance.vnode 的结果就是 h(MyComponent, {}, []) 的返回值,而 instance.subTree 就是 h("p", {}, ["hello"]) 的执行结果。
现在,我们先尝试着将 h 函数的第一个参数添加一个组件定义的类型支持。
话虽如此,但是我们现在对组件的具体类型定义还不是很明确,所以这里简单的定义为一个对象。
那么修改 ~/packages/runtime-core/vnode.ts:
export type VNodeTypes = string | typeof Text | object // 增加 object 类型~/packages/runtime-core/h.ts
export function h(
  type: string | object, // 增加 object 类型
  props: VNodeProps
) {...}
给 VNode 增加一个 component 属性,用来记录对应的组件实例。
export interface VNode<HostNode = any> {
  // .
  // .
  // .
  component: ComponentInternalInstance | null // 追加
}
それに伴って、renderer の方でもコンポーネントを扱う必要が出てくるのですが、Element や Text と同様 processComponent を実装して、mountComponent と patchComponent (updateComponent) も実装していきましょう。
除此之外,renderer 渲染器部分也需要增加组件的处理。
所以我们还需要像实现 Element 和 Text 一样来实现 processComponent 方法,以及 mountComponent 和 patchComponent(updateComponent)两个具体的处理函数。
我们先编写一个大致模板,然后再进行详细说明。
const patch = (n1: VNode | null, n2: VNode, container: RendererElement) => {
  const { type } = n2
  if (type === Text) {
    processText(n1, n2, container)
  } else if (typeof type === 'string') {
    processElement(n1, n2, container)
  } else if (typeof type === 'object') {
    // 增加的判断分支
    processComponent(n1, n2, container)
  } else {
    // do nothing
  }
}

const processComponent = (
  n1: VNode | null,
  n2: VNode,
  container: RendererElement,
) => {
  if (n1 == null) {
    mountComponent(n2, container)
  } else {
    updateComponent(n1, n2)
  }
}

const mountComponent = (initialVNode: VNode, container: RendererElement) => {
  // TODO:
}

const updateComponent = (n1: VNode, n2: VNode) => {
  // TODO:
}
那么,我们先来看一下 mountComponent 函数。
这个函数需要做 3 件事情:
- 生成组件实例
- 执行
setup函数并保留执行结果 - 生成
ReactiveEffect实例并保留在组件实例中
首先,我们先在 component.ts 中实现用于生成组件实例的工具函数 (类似构造函数的作用)。
export function createComponentInstance(
  vnode: VNode,
): ComponentInternalInstance {
  const type = vnode.type as Component

  const instance: ComponentInternalInstance = {
    type,
    vnode,
    next: null,
    effect: null!,
    subTree: null!,
    update: null!,
    render: null!,
    isMounted: false,
  }

  return instance
}
组件实例的各属性的类型应该都是 non-null,但是在实例刚刚生成的时候,默认是填入 null。(Vue.js 源码中也是这么处理的。)
const mountComponent = (initialVNode: VNode, container: RendererElement) => {
  const instance: ComponentInternalInstance = (initialVNode.component =
    createComponentInstance(initialVNode))
  // TODO: setup component
  // TODO: setup effect
}
接下来是 setup。这个可以仿照之前 render 函数的处理方式来处理,只是这里需要将结果保存到组件实例上而不是用一个变量来保存。
const mountComponent = (initialVNode: VNode, container: RendererElement) => {
  const instance: ComponentInternalInstance = (initialVNode.component =
    createComponentInstance(initialVNode))

  const component = initialVNode.type as Component
  if (component.setup) {
    instance.render = component.setup() as InternalRenderFunction
  }

  // TODO: setup effect
}
最后,就是生成一个 effect 对象。但是因为这部分的逻辑可能会比较长,所以将其抽离为了 setupRenderEffect 函数。 在这种情况下,我们所要做的基本上就是将先前 render 函数中实现的内容直接移植过来,同时使用当前组件实例的状态。
const mountComponent = (initialVNode: VNode, container: RendererElement) => {
  const instance: ComponentInternalInstance = (initialVNode.component =
    createComponentInstance(initialVNode))

  const component = initialVNode.type as Component
  if (component.setup) {
    instance.render = component.setup() as InternalRenderFunction
  }

  setupRenderEffect(instance, initialVNode, container)
}

const setupRenderEffect = (
  instance: ComponentInternalInstance,
  initialVNode: VNode,
  container: RendererElement,
) => {
  const componentUpdateFn = () => {
    const { render } = instance

    if (!instance.isMounted) {
      // mount process
      const subTree = (instance.subTree = normalizeVNode(render()))
      patch(null, subTree, container)
      initialVNode.el = subTree.el
      instance.isMounted = true
    } else {
      // patch process
      let { next, vnode } = instance

      if (next) {
        next.el = vnode.el
        next.component = instance
        instance.vnode = next
        instance.next = null
      } else {
        next = vnode
      }

      const prevTree = instance.subTree
      const nextTree = normalizeVNode(render())
      instance.subTree = nextTree

      patch(prevTree, nextTree, hostParentNode(prevTree.el!)!) // ※ 1
      next.el = nextTree.el
    }
  }

  const effect = (instance.effect = new ReactiveEffect(componentUpdateFn))
  const update = (instance.update = () => effect.run()) // 注册 instance.update 属性
  update()
}
※ 1: 在 nodeOps 中实现一个名为 parentNode 的函数,以获取指定节点的父节点。
parentNode: (node) => {
    return node.parentNode;
},
上面的内容可能有点儿长,但是我决定并不是特别难。
并且由于我们在 setupRenderEffect 函数中已经实现了一个 update 函数来作为组件实例的更新方法,所以我们只需要在 updateComponent 中调用这个方法就行了。
const updateComponent = (n1: VNode, n2: VNode) => {
  const instance = (n2.component = n1.component)!
  instance.next = n2
  instance.update()
}
最后,我们将 render 函数中关于组件的部分无用逻辑移除掉。
const render: RootRenderFunction = (rootComponent, container) => {
  const vnode = createVNode(rootComponent, {}, [])
  patch(null, vnode, container)
}
これで Component をレンダリングすることができました。試しに playground コンポーネントを作ってみてみましょう。
このように、コンポーネントに分割してレンダリングができるようになっているかと思います。
现在我们已经可以渲染组件了。让我们在 playground 尝试创建一个组件来测试一下。
我认为现在可以像这样将其分为一个组件并渲染它们。
import { createApp, h, reactive } from 'chibivue'

const CounterComponent = {
  setup() {
    const state = reactive({ count: 0 })
    const increment = () => state.count++

    return () =>
      h('div', {}, [
        h('p', {}, [`count: ${state.count}`]),
        h('button', { onClick: increment }, ['increment']),
      ])
  },
}

const app = createApp({
  setup() {
    return () =>
      h('div', { id: 'my-app' }, [
        h(CounterComponent, {}, []),
        h(CounterComponent, {}, []),
        h(CounterComponent, {}, []),
      ])
  },
})

app.mount('#app')
当前源代码位于: chibivue (GitHub)
组件之间的交互
现在这些组件已经是可用和可复用的了,但是我真的希望能通过使用 Props 和 Emits 来让它们更加强大。
所以从现在开始,我们将继续实现 Props/Emits 以完成组件之间的通信。
Props
首先,先开始实现 props。
我们先从希望实现的效果开始,
让我们假设将 props 作为 setup 函数的第一个参数。
const MyComponent = {
  props: { message: { type: String } },

  setup(props) {
    return () => h('div', { id: 'my-app' }, [`message: ${props.message}`])
  },
}

const app = createApp({
  setup() {
    const state = reactive({ message: 'hello' })

    const changeMessage = () => {
      state.message += '!'
    }

    return () =>
      h('div', { id: 'my-app' }, [
        h(MyComponent, { message: state.message }, []),
      ])
  },
})
基于这种使用方式,我们来思考一下 ComponentInternalInstance 现在还应该拥有哪些信息。
首先,我们需要一个指定 props 参数类型定义(例如 props: { message: { type: String } })的属性,以及一个保存了实际的 props 传递的值的属性。
所以我们添加下面这两个参数定义:
export type Data = Record<string, unknown>

export interface ComponentInternalInstance {
  // .
  // .
  // .
  propsOptions: Props // 记录例如 `props: { message: { type: String } }` 这样的类型定义对象

  props: Data // 保留父级组件实际传递的数据(在本例中,就是 `{ message: "hello" }`)
}
然后创建一个文件 ~/packages/runtime-core/componentProps.ts 并写入下面的内容。
export type Props = Record<string, PropOptions | null>

export interface PropOptions<T = any> {
  type?: PropType<T> | true | null
  required?: boolean
  default?: null | undefined | object
}

export type PropType<T> = { new (...args: any[]): T & {} }
还要给组件的定义中增加一个 props 选项定义。
export type ComponentOptions = {
  props?: Record<string, any> // 追加
  setup?: () => Function
  render?: Function
}
使用 createComponentInstance 创建组件实例时,在 propsOptions 中设置从组件定义中传递过来的 props 的定义。
export function createComponentInstance(
  vnode: VNode
): ComponentInternalInstance {
  const type = vnode.type as Component;

  const instance: ComponentInternalInstance = {
    // .
    // .
    // .
    propsOptions: type.props || {},
    props: {},
这里生成 instance.props 的关键,就是根据 propsOptions 中的定义来过滤掉 vnode 对象中带有的 props 数据。
然后将过滤得到的数据通过 reactive 转换为响应式数据并赋值给 instance.props。
我们在 componentProps.ts 文件中编写一个 initProps 函数来进行这个处理操作。
export function initProps(
  instance: ComponentInternalInstance,
  rawProps: Data | null,
) {
  const props: Data = {}
  setFullProps(instance, rawProps, props)
  instance.props = reactive(props)
}

function setFullProps(
  instance: ComponentInternalInstance,
  rawProps: Data | null,
  props: Data,
) {
  const options = instance.propsOptions

  if (rawProps) {
    for (let key in rawProps) {
      const value = rawProps[key]
      if (options && options.hasOwnProperty(key)) {
        props[key] = value
      }
    }
  }
}然后我们要在挂载(mount)期间实际执行 initProps 并将 props 传递给 setup 函数。
const mountComponent = (initialVNode: VNode, container: RendererElement) => {
    const instance: ComponentInternalInstance = (initialVNode.component =
      createComponentInstance(initialVNode));

    // init props
    const { props } = instance.vnode;
    initProps(instance, props);

    const component = initialVNode.type as Component;
    if (component.setup) {
      instance.render = component.setup(
        instance.props // 传递给 setup
      ) as InternalRenderFunction;
    }
    // .
    // .
// .export type ComponentOptions = {
props?: Record<string, any>
setup?: (props: Record<string, any>) => Function // 要接受 props 参数
render?: Function
}此时,我们应该已经能通过 props 像子组件传递参数了,让我们在 playground 中试验一下。
const MyComponent = {
props: { message: { type: String } },
setup(props: { message: string }) {
return () => h('div', { id: 'my-app' }, [`message: ${props.message}`])
},
}
const app = createApp({
setup() {
const state = reactive({ message: 'hello' })
return () =>
h('div', { id: 'my-app' }, [
h(MyComponent, { message: state.message }, []),
])
},
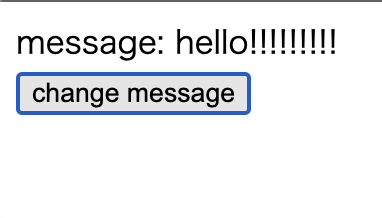
})但是,实际使用中仅仅这样是远远不够的,当 props 更新时画面并不会更新。
const MyComponent = {
  props: { message: { type: String } },

  setup(props: { message: string }) {
    return () => h('div', { id: 'my-app' }, [`message: ${props.message}`])
  },
}

const app = createApp({
  setup() {
    const state = reactive({ message: 'hello' })
    const changeMessage = () => {
      state.message += '!'
    }

    return () =>
      h('div', { id: 'my-app' }, [
        h(MyComponent, { message: state.message }, []),
        h('button', { onClick: changeMessage }, ['change message']),
      ])
  },
})
为了使组件能够进行更新,我们要在 componentProps.ts 文件中实现一个 updateProps 函数,然后在组件更新时执行它。
~/packages/runtime-core/componentProps.ts
export function updateProps(
  instance: ComponentInternalInstance,
  rawProps: Data | null,
) {
  const { props } = instance
  Object.assign(props, rawProps)
}
~/packages/runtime-core/renderer.ts
const setupRenderEffect = (
    instance: ComponentInternalInstance,
    initialVNode: VNode,
    container: RendererElement
  ) => {
    const componentUpdateFn = () => {
      const { render } = instance;
      if (!instance.isMounted) {
        const subTree = (instance.subTree = normalizeVNode(render()));
        patch(null, subTree, container);
        initialVNode.el = subTree.el;
        instance.isMounted = true;
      } else {
        let { next, vnode } = instance;

        if (next) {
          next.el = vnode.el;
          next.component = instance;
          instance.vnode = next;
          instance.next = null;
          updateProps(instance, next.props); // 这里
这样画面更新的话就 OK 了。
这样一来,我们就可以通过使用 props将数据传递给子组件!
当前源代码位于:chibivue (GitHub)
顺道一提,Vue.js 的源码中还支持 kebab-case 格式的 props 配置,所以我们也来实现以下这个功能。 我们在 ~/packages/shared 这个文件夹下面创建一个 general.ts 的文件。 这里的内容不仅可以提供给 runtime-core 和 runtime-dom 使用,还可以后面提供给其他模块,是用来定义通用函数的地方。
我们现在创建这个包实际上没有太大的意义,只是为了和 Vue.js 的源码保持一致。
现在,我们先开始实现 hasOwn 和 camelize 两个相关函数的实现.
~/packages/shared/general.ts
const hasOwnProperty = Object.prototype.hasOwnProperty
export const hasOwn = (
  val: object,
  key: string | symbol,
): key is keyof typeof val => hasOwnProperty.call(val, key)

const camelizeRE = /-(\w)/g
export const camelize = (str: string): string => {
  return str.replace(camelizeRE, (_, c) => (c ? c.toUpperCase() : ''))
}
现在我们可以在 componentProps.ts 中使用 camelize 来处理属性名了。
export function updateProps(
  instance: ComponentInternalInstance,
  rawProps: Data | null,
) {
  const { props } = instance
  // -------------------------------------------------------------- 这里
  Object.entries(rawProps ?? {}).forEach(([key, value]) => {
    props[camelize(key)] = value
  })
}

function setFullProps(
  instance: ComponentInternalInstance,
  rawProps: Data | null,
  props: Data,
) {
  const options = instance.propsOptions

  if (rawProps) {
    for (let key in rawProps) {
      const value = rawProps[key]
      // -------------------------------------------------------------- 这里
      // kebab -> camel
      let camelKey
      if (options && hasOwn(options, (camelKey = camelize(key)))) {
        props[camelKey] = value
      }
    }
  }
}
这样我们应该可以处理 kebab-case 这种属性了。 让我们在 playground 中试验一下。
const MyComponent = {
  props: { someMessage: { type: String } },

  setup(props: { someMessage: string }) {
    return () => h('div', {}, [`someMessage: ${props.someMessage}`])
  },
}

const app = createApp({
  setup() {
    const state = reactive({ message: 'hello' })
    const changeMessage = () => {
      state.message += '!'
    }

    return () =>
      h('div', { id: 'my-app' }, [
        h(MyComponent, { 'some-message': state.message }, []),
        h('button', { onClick: changeMessage }, ['change message']),
      ])
  },
})
Emits
现在我们在 Props 的基础上来实现 Emits。
因为 Emits 的实现比较轻量,所以我们可以很快就处理完这部分内容。
从 Vue.js 的使用方式来看,emit 可以从 setup 函数的第二个参数中获取到。
const MyComponent: Component = {
  props: { someMessage: { type: String } },

  setup(props: any, { emit }: any) {
    return () =>
      h('div', {}, [
        h('p', {}, [`someMessage: ${props.someMessage}`]),
        h('button', { onClick: () => emit('click:change-message') }, [
          'change message',
        ]),
      ])
  },
}

const app = createApp({
  setup() {
    const state = reactive({ message: 'hello' })
    const changeMessage = () => {
      state.message += '!'
    }

    return () =>
      h('div', { id: 'my-app' }, [
        h(
          MyComponent,
          {
            'some-message': state.message,
            'onClick:change-message': changeMessage,
          },
          [],
        ),
      ])
  },
})
和 props 一样,我们创建一个文件 ~/packages/runtime-core/componentEmits.ts 然后在这里面实现相关的内容。
Emit 只是在实例中实现一个 emit 函数,并在运行过程中在 vnode 的 props 中查找对应的处理程序并执行它。
~/packages/runtime-core/componentEmits.ts
export function emit(
  instance: ComponentInternalInstance,
  event: string,
  ...rawArgs: any[]
) {
  const props = instance.vnode.props || {}
  let args = rawArgs

  let handler =
    props[toHandlerKey(event)] || props[toHandlerKey(camelize(event))]

  if (handler) handler(...args)
}
~/packages/shared/general.ts
export const capitalize = (str: string) =>
  str.charAt(0).toUpperCase() + str.slice(1)

export const toHandlerKey = (str: string) => (str ? `on${capitalize(str)}` : ``)
~/packages/runtime-core/component.ts
export interface ComponentInternalInstance {
  // .
  // .
  // .
  emit: (event: string, ...args: any[]) => void
}

export function createComponentInstance(
  vnode: VNode,
): ComponentInternalInstance {
  const type = vnode.type as Component

  const instance: ComponentInternalInstance = {
    // .
    // .
    // .
    emit: null!, // to be set immediately
  }

  instance.emit = emit.bind(null, instance)
  return instance
}
然后将这个对象传递给 setup 函数即可。
~/packages/runtime-core/componentOptions.ts
export type ComponentOptions = {
  props?: Record<string, any>
  setup?: (
    props: Record<string, any>,
    ctx: { emit: (event: string, ...args: any[]) => void },
  ) => Function // 传递 ctx 已接收 emit
  render?: Function
}const mountComponent = (initialVNode: VNode, container: RendererElement) => {
const instance: ComponentInternalInstance = (initialVNode.component =
createComponentInstance(initialVNode));
const { props } = instance.vnode;
initProps(instance, props);
const component = initialVNode.type as Component;
if (component.setup) {
// 把 emit 传递过去
instance.render = component.setup(instance.props, {
emit: instance.emit,
}) as InternalRenderFunction;
}现在就可以使用我们刚刚编写的那部分使用代码来检查这个功能了。
如果它们能够正常工作,那么我们就可以使用 props/emit 来完成组件之间的通信了。
当前源代码位于:
chibivue (GitHub)