简易 Virtual DOM
Virtual DOM 有什么用处?
在上一章中,我们通过实现响应式系统来完成了画面的动态更新。 现在,让我们再来回顾一下 render 函数中的内容。
const render: RootRenderFunction = (vnode, container) => {
  while (container.firstChild) container.removeChild(container.firstChild)
  const el = renderVNode(vnode)
  hostInsert(el, container)
}
也许有人在上一章的时候就发现了 “这种实现方式非常糟糕”。 因为函数中存在着很多的“浪费”。
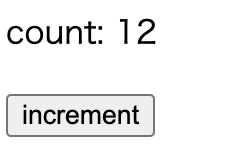
再看一下 playground 中的使用。
const app = createApp({
  setup() {
    const state = reactive({ count: 0 })
    const increment = () => state.count++

    return function render() {
      return h('div', { id: 'my-app' }, [
        h('p', {}, [`count: ${state.count}`]),
        h('button', { onClick: increment }, ['increment']),
      ])
    }
  },
})其中最明显的问题就是,increment 方法执行的时候改动的仅仅只有 count: ${state.count} 这部分,但是 renderVNode 函数却是将原来的 DOM 元素全部移除之后再重新创建新的元素。
这不禁让我感觉到这种操作完全是在“浪费”。
现在这个 demo 还很小,所以它看起来没有任何问题,但是如果在我们实际开发 Web 应用程序的时候,render 都需要移除所有元素然后重新渲染的话,我们很容易就能想到这会导致性能的急剧下降。
所以,既然我们已经有了 Virtual DOM 这个概念,那么在进行页面更新渲染的时候,就应该只比较 Virtual DOM 之间的差异部分,然后再进行对应的 DOM 操作来更新画面。
这就是我们这一章的主要内容。
让我们再看一下示例中的使用代码部分,看看我们需要怎么做。
当我们有了 playground 示例中的这样的组件时,h 函数返回的应该是这样的一个 Virtual DOM(对象)。 第一次渲染时,count 的值是 0,所以看起来是这样:
const vnode = {
  type: "div",
  props: { id: "my-app" },
  children: [
    {
      type: "p",
      props: {},
      children: [`count: 0`]
    },
    {
      type: "button",
      { onClick: increment },
      children: ["increment"]
    }
  ]
}
我们先将这个 vnode 对象保存下来,然后检查一下下一次状态更新时的 vnode 对象。 当我们第一次点击按钮时,vnode 应该是这样的:
const nextVnode = {
  type: "div",
  props: { id: "my-app" },
  children: [
    {
      type: "p",
      props: {},
      children: [`count: 1`] // 我们只需要更新的地方
    },
    {
      type: "button",
      { onClick: increment },
      children: ["increment"]
    }
  ]
}
此时,我们有 vnode 和 nextVnode 两个虚拟 DOM 对象,并且此时画面应该还是显示 vnode 对应的内容(这是在 nextVnode 更新之前的两个对象的状态)。 我现在需要将这两个对象传递给 patch 函数进行差异部分的更新渲染。
const vnode = {...}
const nextVnode = {...}
patch(vnode, nextVnode, container)
正如我声明的函数名一样,这种只渲染差异部分的方式叫做 patch(补丁渲染),有时候也可以称为 reconciliation 协调渲染。 通过比较这两个 Virtual DOM 对象,我们可以更高效地更新画面。
在实现 patch 函数之前
虽然这部分内容与本章的主要内容没有太大关系,但是我还是要在这里对之前的代码做一些轻微的重构。 现在我们在 vnode.ts 文件中创建一个 createVNode 函数(这对于我们这章讨论的内容还是很有必要的),然后在 h 函数中调用它。
export function createVNode(
  type: VNodeTypes,
  props: VNodeProps | null,
  children: unknown,
): VNode {
  const vnode: VNode = { type, props, children }
  return vnode
}
h 函数也要修改一下:
export function h(
  type: string,
  props: VNodeProps,
  children: (VNode | string)[],
) {
  return createVNode(type, props, children)
}
从现在开始就是核心内容了。
在之前的代码中,VNode 的子节点类型一直是 (Vnode | string)[],但是继续将 Text 文本看做一个字符串对于后面的逻辑来说是没有什么意义的,所以我决定将子节点类型统一修改成 Vnode[]。
实际上,我们仔细思考一下,文本通常体现在页面上通常也不仅仅就是一个字符串,而是一个 HTML TextElement 元素存在的,它对普通的字符串要多了很多属性以及方法,所以我们可以把它也当做一个 Vnode 来处理它的其他属性。
具体的处理方式就是,固定一个 Text 的 Symbol 字段做为文本节点的 VNode 的类型。 例如我们有一个 "hello" 的文本,体现成 vnode 对象如下:
{
  type: Text,
  props: null,
  children: "hello"
}
大概就是这样。
当然,需要注意的一点是,我们的 h 函数依然按照之前的使用方式使用,而上面 Text 这样的节点对象,则是编写一个 normalizeVNode 来进行转换,然后提供给 renderer 中使用。
这也是为了和 Vue.js 保持一致。
~/packages/runtime-core/vnode.ts;
export const Text = Symbol();

export type VNodeTypes = string | typeof Text;

export interface VNode<HostNode = any> {
  type: VNodeTypes;
  props: VNodeProps | null;
  children: VNodeNormalizedChildren;
}

export interface VNodeProps {
  [key: string]: any;
}

// normalize 之后的类型
export type VNodeNormalizedChildren = string | VNodeArrayChildren;
export type VNodeArrayChildren = Array<VNodeArrayChildren | VNodeChildAtom>;

export type VNodeChild = VNodeChildAtom | VNodeArrayChildren;
type VNodeChildAtom = VNode | string;

export function createVNode(...) {...} // 省略

// normalize 函数。(在 renderer.ts 使用)
export function normalizeVNode(child: VNodeChild): VNode {
  if (typeof child === "object") {
    return { ...child } as VNode;
  } else {
    // 在 child 是 string 类型的情况下转换为刚才介绍的那种形式
    return createVNode(Text, null, String(child));
  }
}
这样 Text 也可以作为 VNode 来处理了。
patch 函数的设计
首先我们来看一下源代码中 patch 函数是怎么设计的(目前我们还不需要实现它,只是先理解就好了)。
在使用 patch 函数时,主要是对比新旧两个 vnode 对象的差异,为了方便起见,我这里把两个 vnode 对象分别称为 vnode1 和 vnode2,但是在第一次渲染的时候,vnode1 是不存在的。
也就是说,利用 patch 函数对比 vnode 对象要分为两种情况:首次渲染(利用 vnode2 生成 DOM 元素)和比较 vnode1 与 vnode2 的差异并更新差异。
这两种处理情况分别被命名为 mount 和 patch。
并且针对不同的类型节点类型,比如 ElementNode 和 TextNode 有不同的处理方案(名称与 process 进行组合,用来区分处理不同类型;然后根据 mount 或者 patch 来区分是首次渲染还是更新差异)。
const patch = (
  n1: VNode | string | null,
  n2: VNode | string,
  container: HostElement,
) => {
  const { type } = n2
  if (type === Text) {
    processText(n1, n2, container)
  } else {
    processElement(n1, n2, container)
  }
}

const processElement = (
  n1: VNode | null,
  n2: VNode,
  container: HostElement,
) => {
  if (n1 === null) {
    mountElement(n2, container)
  } else {
    patchElement(n1, n2)
  }
}

const processText = (n1: string | null, n2: string, container: HostElement) => {
  if (n1 === null) {
    mountText(n2, container)
  } else {
    patchText(n1, n2)
  }
}
尝试去实现它
从这里开始我们要实现 Virtual DOM 的 patch 函数了。
首先,我们希望在挂载 vnode 时能够获得对 vnode 中实际 DOM 对象的引用,无论它是 Element 还是 Text。 所以我们将 el 属性添加到 vnode 上。
~/packages/runtime-core/vnode.ts
export interface VNode<HostNode = RendererNode> {
  type: VNodeTypes
  props: VNodeProps | null
  children: VNodeNormalizedChildren
  el: HostNode | undefined
}
现在我们需要回到 ~/packages/runtime-core/renderer.ts 文件里面。
我们需要在 createRenderer 函数中实现 patch 函数。 首先把原来的 renderVNode 函数移除掉。
export function createRenderer(options: RendererOptions) {
  // .
  // .
  // .

  const patch = (n1: VNode | null, n2: VNode, container: RendererElement) => {
    const { type } = n2
    if (type === Text) {
      // processText(n1, n2, container);
    } else {
      // processElement(n1, n2, container);
    }
  }
}
先从 processElement 的 mountElement 开始实现。
const processElement = (
  n1: VNode | null,
  n2: VNode,
  container: RendererElement,
) => {
  if (n1 === null) {
    mountElement(n2, container)
  } else {
    // patchElement(n1, n2);
  }
}

const mountElement = (vnode: VNode, container: RendererElement) => {
  let el: RendererElement
  const { type, props } = vnode
  el = vnode.el = hostCreateElement(type as string)

  mountChildren(vnode.children, el) // TODO:

  if (props) {
    for (const key in props) {
      hostPatchProp(el, key, props[key])
    }
  }

  hostInsert(el, container)
}
因为传递的 vnode 对应的是一个元素节点,所以我们还需要把它的子元素也一起处理了。
这里可以使用之前定义的 normalize 相关函数。
const mountChildren = (children: VNode[], container: RendererElement) => {
  for (let i = 0; i < children.length; i++) {
    const child = (children[i] = normalizeVNode(children[i]))
    patch(null, child, container)
  }
}
现在,我们就已经完成了普通元素的渲染了。
接下来,我们开始实现 Text 文本节点的渲染。这一步只是一个简单的 DOM 操作。
根据之前的说明,我们将其分为了 mountText 和 patchText 两个函数,但是并没有做太多其他处理。 想来以后也不会有太大改动,所以这里我们就直接写了。
const processText = (
  n1: VNode | null,
  n2: VNode,
  container: RendererElement,
) => {
  if (n1 == null) {
    hostInsert((n2.el = hostCreateText(n2.children as string)), container)
  } else {
    // TODO: patch
  }
}
暂且写到道理,现在我们应该就已经可以进行元素的首次渲染了,这里我们修改一下 render 函数的实现,在里面使用我们刚刚编写的 patch 函数,然后再在 playground 中验证一下。
并且到目前为止,我们也需要将 createAppAPI 中 mount 里面编写的一些逻辑移动到 render 函数中,以便我可以更方便的保留两次的 vnode 对象。
具体来说,就是将原来传递给 render 函数的 vnode 对象直接替换为当前的组件 rootComponent,然后在 render 函数中创建 ReactiveEffect 副作用对象与执行首次渲染逻辑。
return function createApp(rootComponent) {
  const app: App = {
    mount(rootContainer: HostElement) {
      // 直接传递 rootComponent 组件
      render(rootComponent, rootContainer)
    },
  }
}const render: RootRenderFunction = (rootComponent, container) => {
const componentRender = rootComponent.setup!()
let n1: VNode | null = null
const updateComponent = () => {
const n2 = componentRender()
patch(n1, n2, container)
n1 = n2
}
const effect = new ReactiveEffect(updateComponent)
effect.run()
}我们可以在 playground 中尝试一下,看看画面是否能够显示出来!
但是因为我们的 patch 部门还没有实现,所以点击按钮时画面不能进行更新。
这样的话,我们就继续 patch 的实现吧。
const patchElement = (n1: VNode, n2: VNode) => {
  const el = (n2.el = n1.el!)

  const props = n2.props

  patchChildren(n1, n2, el)

  for (const key in props) {
    if (props[key] !== n1.props?.[key] ?? {}) {
      hostPatchProp(el, key, props[key])
    }
  }
}

const patchChildren = (n1: VNode, n2: VNode, container: RendererElement) => {
  const c1 = n1.children as VNode[]
  const c2 = n2.children as VNode[]

  for (let i = 0; i < c2.length; i++) {
    const child = (c2[i] = normalizeVNode(c2[i]))
    patch(c1[i], child, container)
  }
}
Text 也是一样的。
const processText = (
  n1: VNode | null,
  n2: VNode,
  container: RendererElement,
) => {
  if (n1 == null) {
    hostInsert((n2.el = hostCreateText(n2.children as string)), container)
  } else {
    // 增加的 patch 处理部分
    const el = (n2.el = n1.el!)
    if (n2.children !== n1.children) {
      hostSetText(el, n2.children as string)
    }
  }
}
※ 关于 patchChildren 函数,本来是还要增加一个 key 属性来支持动态长度(子元素个数顺序等会变化)子元素的,但是因为目前我们只是为了实现一个简易的 Virtual DOM,所以这里暂时就不讨论目前的方案实不实用了。
如果您希望能实现这部分功能的话,可以查看后面的“基础虚拟 DOM”章节,那里会对这些进行详细的分析。 这一节,我们的主要目的是了解 Virtual DOM 的作用以及基本实现。
现在,我们已经可以进行差异渲染(补丁渲染)了,让我们看看 playground 的效果。
恭喜!现在你已经可以使用 Virtual DOM 来实现补丁渲染了。
当前源代码位于: GitHub